
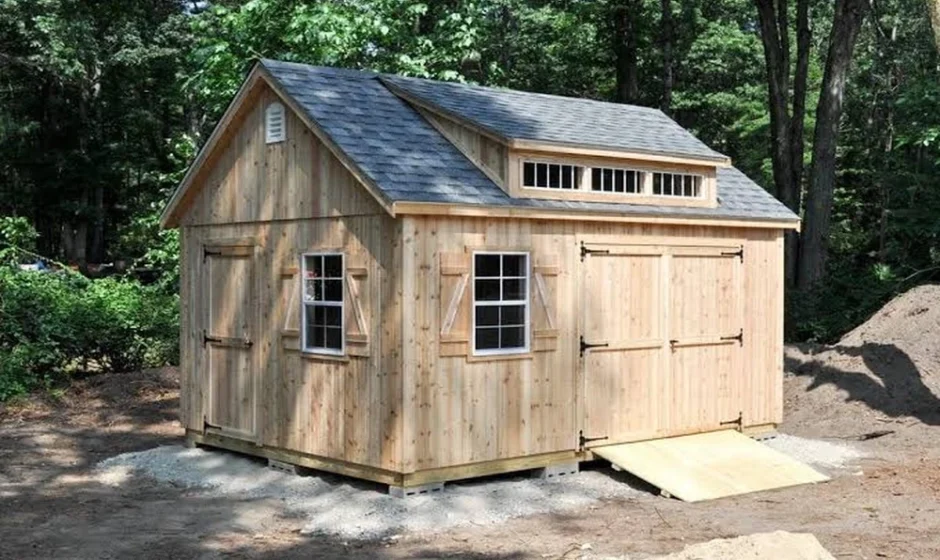

A backyard that looks flat from the patio can hide a lot. There may be a slight fall toward the fence, a soft patch where water sits after a storm, or a utility easement running right where the shed was supposed to go. None of that shows up when you are standing at the back door picturing the finished building, but all of it shows up once the base is poured or the walls go up.
That is why a successful Amarillo onsite installation is mostly decided before any lumber or panels arrive. The location, the ground underneath, the route equipment will take and the way the frame is tied down all shape how the shed performs years from now. Exposed Panhandle yards add another factor, because steady and strong wind punishes loose connections and poorly sited doors.
The seven steps below follow the order the work usually happens. They start at the property line and end with the routine checks that keep a finished shed sound.
Homeowners who would rather have that sequence handled from site check to final walkthrough can look into Amarillo onsite installation through a team offering backyard shed installation and prefabricated shed installation, with utility shed construction and outdoor storage solutions available when the project calls for more than a basic storage building. A sensible first move is to request an onsite installation assessment so the yard, access route and base can be evaluated before any building is chosen.
1. Confirm Property Boundaries and Placement
Start by finding out exactly where your lot ends. A survey, plat or closing documents usually show the lot lines and any recorded easements, and easements matter because utilities or drainage may run through them. Then check setback rules for accessory buildings with the city and any neighborhood association, since these limit how close a shed can sit to fences and property lines.
Working space is easy to overlook. Installers need room on every side to frame walls, set panels and reach the roof. They also need it later to stain siding or fix trim. A shed squeezed tight against a fence may fit legally but leave one wall you can never maintain.
2. Read the Ground Conditions and Drainage
Soil and water behavior tell you more than a level glance ever will. Before committing to a spot, walk through a quick evaluation.
- Watch the area during or right after rain to see where water collects and which way it runs.
- Probe the soil for soft or loose sections, recent fill, roots and buried debris.
- Run a string line or long level across the site to measure the actual slope.
- Note downspouts, patios and neighboring yards that send runoff toward the location.
A spot that holds standing water will keep doing so after the shed is built, only now the water sits against the floor framing. Small grading corrections, or moving the shed a few feet uphill, are far easier at this stage than after installation.
3. Prepare a Foundation That Matches the Shed
The City of Amarillo’s Building Safety FAQ says that a single story detached residential accessory building with 200 square feet or less of floor area needs neither a building permit nor a foundation, while larger ones require both. Not being required is different from not being useful, though. Even a small shed needs a level, stable base to keep doors square and wood off damp soil.
Compacted gravel pads drain well and work for many wooden sheds built on skids. Concrete slabs suit heavier equipment, workshop floors and buildings that will be anchored directly into the base. Concrete blocks or piers can level a shed on a sloped site but need careful spacing so the floor does not sag between supports. The design of the building should decide which base you choose. A shed meant for a riding mower places very different loads on its floor than one holding garden tools and bins.
4. Plan Material and Equipment Access
Before delivery day, trace the full route from the street to the site.
- Measure every gate width and check whether a fence panel can come down temporarily.
- Look up for tree limbs, eaves and service lines that could catch tall loads.
- Identify sprinkler heads, septic components and soft ground that heavy equipment should avoid.
- Set aside a clear staging area for materials near the build spot.
How much access you need depends on the installation method. Onsite construction arrives as lumber and hardware that can be carried through a standard gate. Prefabricated sheds may arrive as large panels or fully built units that need a wider opening, a clear path and sometimes specialized moving equipment. Knowing which method you are using tells you how much preparation the route needs.
5. Assemble the Structure and Anchor It Properly
The floor goes first, and it needs to be square and level, because every wall and roof member above it inherits its accuracy. Measuring the diagonals before fastening the floor framing catches problems while they are still easy to correct. Walls go up plumb and are braced until the roof framing ties them together. Roof panels, underlayment, drip edges and roofing follow, with flashing at every point where water could enter.
In wide-open Panhandle yards, anchoring deserves the same attention as framing. The wind provisions of the International Residential Code, which FEMA has gathered into a public reference document, call for a continuous load path that carries uplift forces from the roof assembly all the way down to the foundation. That principle is worth following on a shed too. Sheds on slabs are typically fastened into the concrete, while sheds on gravel or blocks rely on ground anchors and straps connected to the frame. Follow the shed maker’s anchoring instructions along with any local requirements, and avoid facing large doors into the direction your property takes the hardest gusts. Good anchoring and careful roof edges reduce weak points, but they do not make any shed storm-proof.
6. Handle Permits, Restrictions and Safety
Size limits are only one layer of the rules. Setbacks, easements and neighborhood covenants can apply even when no building permit is needed, so a quick call to the city’s Building Safety department before ordering clears up uncertainty. Associations sometimes add rules about height, color or roofing materials too.
Electrical work is where many shed projects take on extra risk. Lighting, outlets and buried feeds involve trenching, wire sizing and connections at the main panel. Give that work to a licensed electrician who knows current local requirements, and confirm whether it needs its own permit. Call 811 before digging for anchors, piers or trenches so buried utility lines are marked first.
7. Inspect the Finished Shed and Keep Up Maintenance
Once the build is complete, open and close every door and window. They should swing freely and latch without force, because sticking hardware often points to a frame that shifted out of square. Walk around the outside and check the joints where walls meet the roof, the trim around openings and any gaps where light shows through from inside. Water should drain away from the base, not toward it.
After that, regular attention keeps small issues small. Checking the shed after major wind or hail events, resealing trim, keeping gutters and soil clear of the siding, and refreshing paint or stain on wood surfaces will all extend the building’s useful life. A shed placed with care, built on a proper base and checked a few times a year tends to stay square, dry and easy to use long after installation day.